
heka hoods installation guide pdf
Welcome to the Heka Hoods installation guide, your comprehensive resource for successfully installing these minimalist awning systems. This guide covers everything from preparation to final adjustments, ensuring a seamless process for professionals and DIYers alike. Proper installation is crucial for optimal performance and longevity, so follow these steps carefully to achieve a durable, weather-tight finish.
1.1 Overview of Heka Hoods and Their Benefits
Heka Hoods are a sleek, minimalist awning system designed to provide functional weather protection while enhancing architectural aesthetics. Their innovative design eliminates the need for brackets, offering a clean, modern appearance. Prefabricated in one piece with a durable powder-coated finish, Heka Hoods arrive on-site ready to install. This streamlined approach ensures a quick and efficient installation process. Their weather-tight construction protects against the elements, making them ideal for various applications, from residential to commercial settings. The benefits of Heka Hoods include ease of installation, long-term durability, and a sophisticated design that complements any façade, ensuring both practicality and visual appeal.
1.2 Importance of Proper Installation
Proper installation of Heka Hoods is essential to ensure their functionality, longevity, and aesthetic appeal. Incorrect installation can lead to issues such as water infiltration, structural instability, or compromised weather protection. Heka Hoods are designed as a pre-fabricated, bracket-less system, requiring precise adherence to installation guidelines to maintain their integrity. Improper alignment or fixing can result in poor performance and potential damage over time. Additionally, failure to follow the recommended installation steps may void the product warranty. Therefore, careful attention to the installation process is crucial to achieve a durable, weather-tight, and visually appealing result that meets the product’s design specifications.

Pre-Installation Requirements
Before installing Heka Hoods, ensure you have all necessary tools and materials. Prepare the site by clearing debris and ensuring structural integrity. Follow safety guidelines to avoid accidents and ensure proper installation conditions.
2.1 Tools and Materials Needed
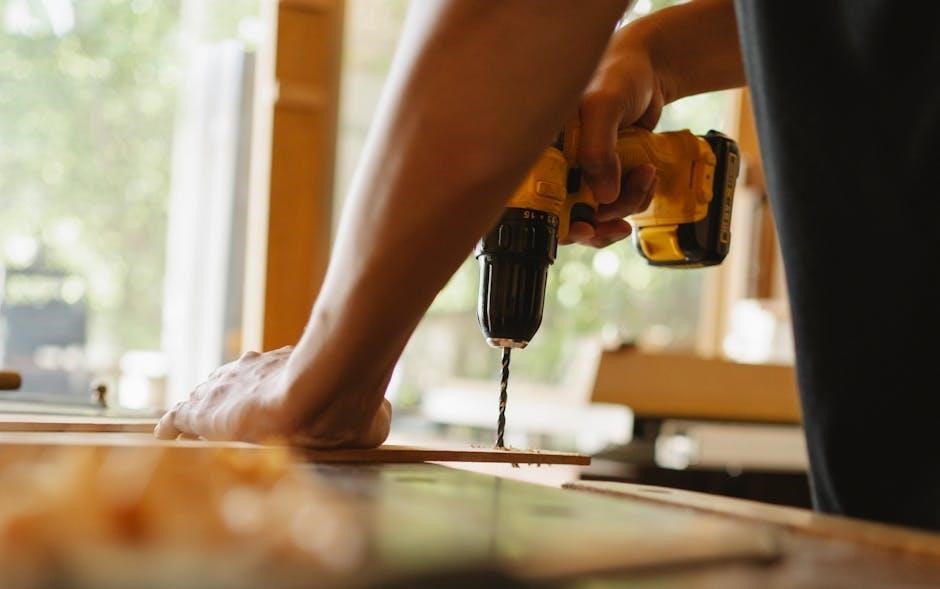
To successfully install Heka Hoods, gather the following tools and materials: a drill with bits, measuring tape, level, gloves, safety glasses, fasteners, sealant, wrench or screwdriver, ladder or scaffolding, and weatherproofing materials. Ensure all items are readily available to streamline the process. Proper tools and materials are essential for a secure, waterproof, and visually appealing installation. Refer to the manufacturer’s specifications for any additional requirements. Having everything prepared beforehand will help avoid delays and ensure a professional finish.

2.2 Site Preparation and Safety Precautions
Before starting the installation, ensure the site is clear of debris and obstructions. Verify the wall or facade is structurally sound and can support the Heka Hood’s weight. Wear proper personal protective equipment (PPE), including gloves, safety glasses, and a dust mask. Ensure ladders or scaffolding are stable and secure. Check the weather conditions to avoid installation during heavy rain or strong winds. Cover nearby surfaces to protect them from dust or damage. Always follow safety guidelines when working at heights, and consider having a second person assist for added safety. Proper preparation ensures a smooth and incident-free installation process.

Step-by-Step Installation Process
This section provides a detailed, sequential guide to installing Heka Hoods, from unpacking to final adjustments. Follow each step carefully to ensure a secure, weather-tight, and professional finish.
3.1 Unpacking and Inspecting the Heka Hood
Begin by carefully unpacking the Heka Hood from its packaging, ensuring all components are included and undamaged. Inspect the hood for any scratches or defects. Verify that the pre-drilled holes and powder-coated finish meet your expectations. Check for the presence of all necessary hardware, such as fasteners and dampers. Handle the hood with care to avoid damage. Once unpacked, review the installation instructions provided with your order to confirm the fixing pattern and other specific requirements. This step ensures a smooth installation process and helps identify any issues early on.
3.2 Positioning the Hood on the Wall or Facade
Once unpacked, carefully position the Heka Hood against the wall or facade, aligning it with the predetermined fixing points. Measure and mark the wall to ensure accurate placement, considering the hood’s width and height. Use a level to confirm the hood is straight and evenly aligned. Double-check the fixing pattern specified in the installation instructions to ensure proper placement. Gently maneuver the hood into position, making sure it sits flush against the wall. This step is critical for achieving a seamless and professional-looking installation; Take your time to ensure precision, as proper alignment affects both appearance and functionality.
3.3 Securing the Hood with Brackets or Fasteners
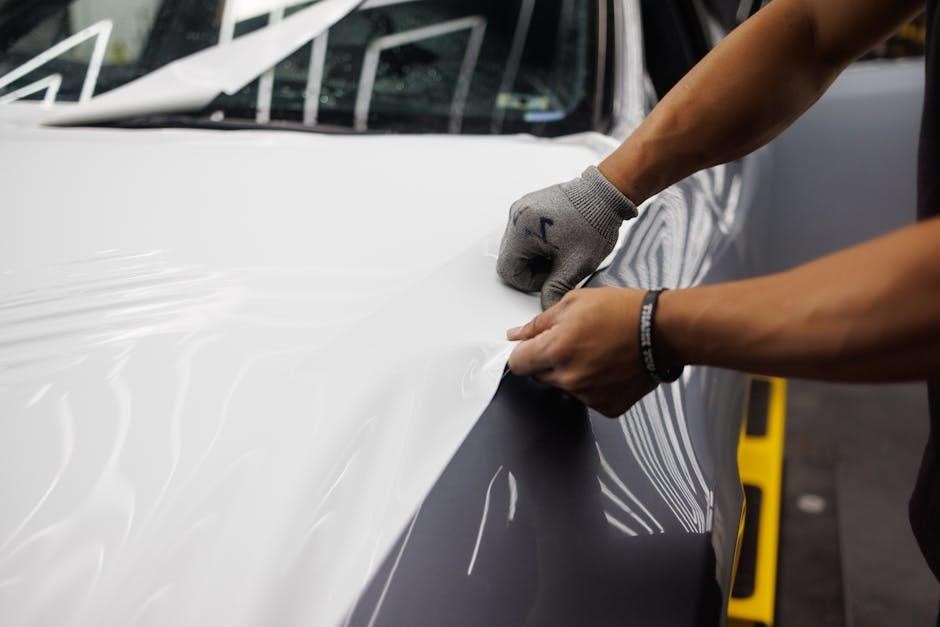
After positioning the hood, secure it using the provided brackets or fasteners. Align the hood’s pre-drilled holes with the marked fixing points on the wall. Insert screws or rivets through the hood and into the wall anchors, ensuring a tight, even fit. Tighten all fasteners gradually to avoid misalignment. For added stability, ensure the hood is flush against the wall and level. If using brackets, attach them firmly to both the hood and the wall, following the manufacturer’s guidelines. Double-check all connections for strength and durability before proceeding. Proper securing ensures the hood remains stable and weather-tight for years to come.
3.4 Sealing Gaps and Ensuring Waterproofing
Once the hood is secured, seal all gaps between the hood and the wall to ensure waterproofing. Apply a high-quality weatherproof sealant around the edges where the hood meets the wall. Inspect the entire surface for any gaps or imperfections and fill them thoroughly. Use a clean, dry cloth to smooth out the sealant for an even finish. Allow the sealant to cure according to the manufacturer’s instructions before exposing the hood to moisture. This step is critical to prevent water infiltration and ensure long-term durability. Regularly inspect and reapply sealant as needed to maintain the hood’s watertight integrity over time.
3.5 Final Checks and Adjustments
After completing the installation, perform a thorough inspection to ensure all components are securely fastened and properly aligned. Check for any gaps or misalignments and make necessary adjustments. Verify that the hood is level and plumb to ensure even water runoff. Test the functionality of any moving parts, such as dampers or hinges, to ensure smooth operation. Inspect the sealant application for completeness and apply additional coats if needed. Review the manufacturer’s guidelines for any final adjustments or torque specifications. Once satisfied, document the installation with photos or notes for future reference and maintenance. This step ensures long-term performance and reliability.
Post-Installation Maintenance
Regularly clean the Heka Hood’s surface with mild soap and water to maintain its appearance. Inspect for wear and tear, and touch up scratches with matching paint.
4.1 Cleaning and Upkeep of the Heka Hood
Regular cleaning is essential to maintain the appearance and functionality of your Heka Hood. Use mild soap and water, avoiding abrasive materials that could scratch the surface. Rinse thoroughly to prevent soap residue. Inspect the hood periodically for wear and tear, addressing any scratches with matching paint. Protect the hood from environmental factors like heavy rain or extreme temperatures, which can cause damage over time. Remove organic debris promptly to prevent staining. For tougher stains, use a gentle cleanser suitable for the hood’s material. By following these steps, you’ll ensure your Heka Hood remains in great condition for years to come.
4.2 Troubleshooting Common Issues
Addressing common issues with your Heka Hood ensures long-term performance. Leaks or water ingress may indicate improper sealing or damaged waterproofing. Inspect and reseal gaps as needed. Dents or scratches can be touched up with matching paint. If the hood becomes discolored, clean it gently with mild soap and water. For fastener issues, tighten loose parts and replace any damaged components. Regularly inspect the hood for wear and tear, especially after harsh weather conditions. If problems persist, consult the installation guide or contact the manufacturer for assistance. Prompt attention to these issues will maintain the hood’s functionality and aesthetic appeal.
By following this guide, you’ve successfully installed your Heka Hood, ensuring optimal functionality and aesthetics. Proper installation and maintenance guarantee long-term durability and weather protection.
5.1 Summary of Key Installation Steps
To ensure a successful installation, start by unpacking and inspecting the Heka Hood for any damage. Position the hood on the wall or facade, aligning it properly. Secure it using the provided brackets or fasteners, following the manufacturer’s guidelines. Seal all gaps to ensure waterproofing and prevent air leaks. Conduct final checks to verify the hood’s stability and functionality. Regular maintenance, including cleaning and troubleshooting, is essential for long-term performance. By adhering to these steps, you can achieve a professional-grade installation that enhances both the functionality and aesthetics of your space.
5.2 Final Tips for Long-Term Performance

For optimal longevity, clean the Heka Hood regularly to prevent dirt buildup. Inspect the system seasonally for wear or damage, addressing issues promptly. Avoid using harsh chemicals, as they may damage the finish. Ensure all seals remain tight to maintain waterproofing. Store cleaning materials nearby for easy upkeep. Consider scheduling annual professional inspections for added peace of mind. By following these tips, you can extend the life of your Heka Hood and ensure it continues to provide reliable protection and aesthetic appeal for years to come.